
To make it easier to discuss and select our lighting style, I have created this page to show the different lighting–which will determine the space (and equipment, for me) that we will need to make these images.
Example 1

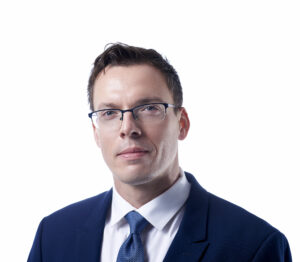
For this headshot, the light is located coming from the side. It adds a nice shadow to the other side, and soft shadows like these add shape to a persons face. The location of the light adds a beautiful catchlight to the eye.
There is a reflector located to her side that reflects light to the darker side of her face to reduce those shadows and make them less harsh.
The background in this image is actually white–but, because there is no light on it, it turns to a shade of gray.
Example 2
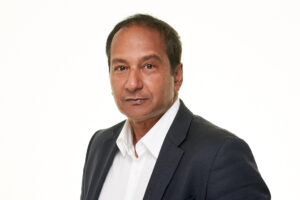
Like the first example, this image has the light placed to the side of his face. The shadows on the other side are less intense because of the lighted background. There is also a curved reflector below his face that is filling in the shadows.
In order to get a perfectly white background, there is a separate light (or lights) required to that shine directly on the backdrop.
Example 3
In this headshot, the light is directly over the center of the subject and his face is more evenly lit from one side to the other. There is also a curved reflector under his face to fill in the shadows under his chin. We are also using the lighted background, as well.
I feel that this lighting is a bit more sterile when compared to more dramatic side lighting, but some businesses prefer this style of lighting.
Headshot Style Decisions
The choices that we must make are:
- Main light to the side (more dramatic), or main light centered of the person’s face (more neutral/flat)
- Lighted background (white) or unlit background (gray)
There are other ways to light a headshot, of course–but, I feel that these options present the best choices in therms of available space in your conference booth that will return the highest quality headshots.